How to build a shed step by step? The old adage “measure twice, cut once” illustrates the importance of proper planning and taking it step by step in woodworking. This will reduce frustration of making wrong cuts and saving you time and money.
How to build a shed? Read up these important steps.
Step 1. If you are a beginner exploring woodworking, a few simple woodworking tools will serve you well in a small studio. You could start out with a solid workbench to which vises and clamps can be attached. Next decide on the workflow and arrange your equipments with safety in mind. For example, to ensure there is ample rooms to move around, you may place a work bench behind your table saw out feed table, a few feet away from each other.
Step 2. A router and router table are ideal for cutting circles, designs and patterns into wood at varying depths, most experienced woodworkers would find them necessary. Additional power tools like hand held circular saw, saber saw, battery powered drill (do include extra drill bits and batteries) and power sanders are also highly useful. If you are using these equipments for the first time, do take time to read up the manual and understand its correct operation. (There may be special equipments needed for your project, refer to your shed woodworking patterns for equipment list for your project.)
Step 3. Other hand tools you are likely to use are hammer, wrench set, tape measure, hand saw, screw drivers, level and chisels. You may want to include goggles, ear muffs and a dust mask for personal safety. A mobile dust collection system and an air ventilation system is necessary too.
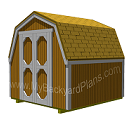
Step 4. Can’t wait to find your wood working plan? Click HERE to download your shed blueprints and instruction guides. If this is your first time building a shed, it may be a good idea to begin with small woodworking projects and build your skills before opting for more complex design. Choosing a ready-to-use ‘how to build a shed” woodworking patterns helps you to get started easily. Challenge your creative skills as you go.
Step 5. To get a comprehensive woodworking patterns, consider woodworking4home package. Buying individual single project plan can be costly when you add up. Woodworking4home is a complete woodworking resource, consists of over thousands of DIY Projects; with detailed diagrams, material lists, equipment lists, lumber type lists and step-by-step instructions with videos.
Step 6. Break down your project into sections with the help of your wood working plan and clearly number your steps to help avoid mistakes. Do be sure to schedule allowance of time for each stage, this will help you to be on track and enjoy building your storage shed.
Step 7. Take your time with measuring each part of your woodworking project. Proper measurements are integral to the success of your project.
“How to build a shed” is not an impossible task. Get your Shed Blueprints TODAY!You will be surprised to end up with a carpentry that you are proud to say you’ve built!
.
Filed under: How to Build a Shed by admin Tagged with: how to build a shed • How to build a Shed Step By Step • shed blueprints • small woodworking projects
 What I'm about to tell you will change the way you look at woodworking projects forever.My name is Ryan Henderson and I've been building wooden outdoor sheds for over 20 years.

No comments:
Post a Comment